
Card for my blog friend Ewa at Zakątek Dzieciątek.


I have took some pictures to share how I make these roses. I use hand made paper form 'Crafty Bits and Bobs' packs. I cut flowers from Spellbinders Rose Creation die. I have learnt how to emboss petals thanks to Sherry Chevver tutorial. And thanks to Tim Holtz tutorial Grounge Rose I learnt how to make rose. I just changed a little bit as Rose Creation die has only five petals and I am using the smallest embossing tool to put the rose together.
Three same size flowers.

Need to be embossed with stylus tool on a embossing mat (or mouse pad) on the reverse. I have learnt how to emboss petals from Sherry Cheever click.

Now turn all flowers up.

And cut out from the first one petal (I often cut the larger out), from the second two petals out.

A little bit of glue at the edge of the petal so the rose will have more petals around.

Petals are glued together just at the edges.

Glue just at the edge all the flowers elements.

Here are five ready elements of the rose.

Sometimes I cut out the ends from the two last elements/petals so it is easier to fit in the center of the rose (especially when the paper is thick)

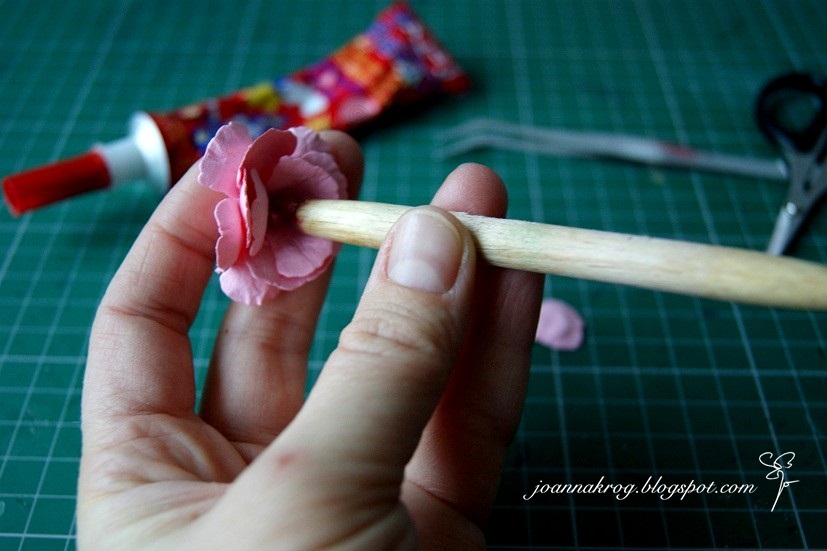
I put together the rose using stylus tool (the smallest one, with the fine ball). It make it very easy to add one by one each element of the flower.

Pressing each time (I use both hands, just now I am holding a camera).

I am trying to add each element of the flower that way so the petals are all over the rose. Sometimes I twist the stylus tool so the element is moving a bit in my desired position (so petals are laying nice all around).


The last petal I am adding with tweezers.

I twist the petal around the tweezers.


And adding to the center of the rose, pushing it gently down.


The end needs to be cut out so it is easier to glue the rose down.


Ready rose.

Joanna
Pin It Now!
No comments:
Post a Comment
Thank You ✿