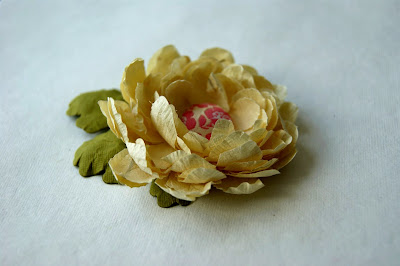
I make all four kinds of daisies using Daisy Heads Spellbinders die.
Daisy I
The first ones I called suszki. How suszka looks like you can find here - kacanka ogordowa.
Daisy I
The first ones I called suszki. How suszka looks like you can find here - kacanka ogordowa.
To create a flower (Daisy I) I used three flowers of each Spellbinders Daisy Heads die. Nine flowers in total.
I cut with scissors between petals.
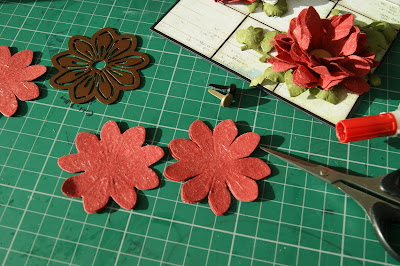
Here are three flowers with cut between petals. I cut them while they where still all together after die cutting.
All flowers ready for next step.
Next step is to emboss petals the way I have learnt from Sherry Cheever video tutorial. Just press each petal with stylus on eg. mouse pad.
All flowers ready.
Now just glue all together. I glued all same sizes flower first. Next all three parts in one flower.
When the flowers is glued just press gently on a mouse like for all flowers which are created that way.
One purple flowers is ready and the other is waiting for a centre.
This one has a corduroy brad as a centre.
And this one has a fabric brad as a centre.
Here are flowers which I got for my birthday and which inspired me to create this flowers :)
Please check KSzp/Klaudia. Klaudia shows how to create chryzantemę and also shows how to create flower from a circle when you do not have a flower dies.
*************
Daisy II
And here is Arlene daisy tutorial, which I use to make Daisy II using Spellbinders Daisy Heads die. I cut petals between before gluing flower together as for the daisy above and do not emboss petals with stylus I just form them with scissors. As I make daisy using Spellbinders Daisy Heads die I need to glue eight folded flowers around.
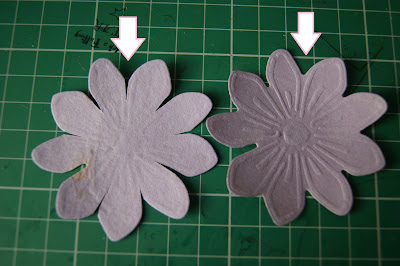
For one daisy I cut 10 same size flowers. Eight to fold and glue on the top of two which make the bottom of the flower. I cut between petals just a little bit.
When I fold each flower I have in mind to fold each the same way so all folded flowers looks the same. After folding they have one petal on the top. The arrow shows the point where I start to fold.
On that picture I just wanted to show which point I have choosen.
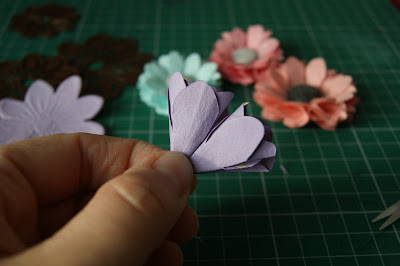
I have in mind the point and fold flower in a half. I place opposite petal just in a middle of those two I picked up at first.
The arrow shows 'my point' behind the petals after folding in a half.
Add some glue and fold in a half again (here Arlene shows on the video how to fold flower in half) I have learn this folding technique from Arlene. Thank you Arlene.
Here is folded flower.
And one more time in a half.
This is the back of the folded flower.
And here is how they look at the front. All folded the same way having in mind the point so all have one petal at the front.
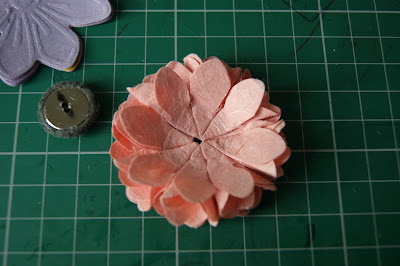
Two daisies at the bottom. And I glue 8 arround.
Here are flower (different one) with all 8 flowers glued in place.
And the back.
The side.
On right handside ready daisy with a brad. And on the left handside is a daisy IV (I showed how to put it together at the end of this post). Just wanted to show the difference.
************
Daisy III
To create a close the daisy I make it same way as daisy III and I am adding on a top six folded daisies which I cut from smaller die.
***********
Daisy IV
update 1.10.12
To create this daisy I cut out 5 same size flowers and cut between petals almost to the center of the flower. Deeper than for the other daisies.
I misted flowers (not on a cutting mat as water will destroy it).
And pinched on both ends. But I pinched much more at the end of the flower than the side with petals.
I pinched this end just a little bit.
And hit dried.
Depend on the paper I use for daisy I put together 5 or more flowers.
And glue all together as they are very fragile after cutting almost to the end. Glue will help to keep all together.
And just make a hole for a brad.
Ready daisy :)
Sometimes I round the brad the way it support petals. I use Papermania brads with longs 'legs', they are very soft/flexible.
With the brad twisted that way the daisy petals stays up.
And than they are easy to form on a card. The samll flower is a real one called 'everlasting flowers' or straw flower'. I used hot glue to glue it to the card.
Joanna
Pin It Now!












No comments:
Post a Comment
Thank You ✿