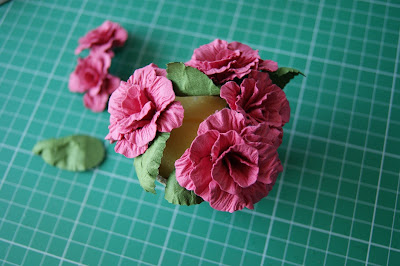
I would like to share my pots with you. The first one are hydrangea in a pot and then roses.
Hydrangea in a pot.
1. Jiffy garden pots by Vilmorin or ceramic mini pots (I could not find any mini ceramic ones in my local shops) Mine are only 6cm diameter.
2. tissue paper
3. PVA glue
4. lots of little flowers (I die cut mine using Sizzix Leaves and Branches die)
5. sponge (I used car wash sponges from Poundland)
6. hot glue
7. good quality (best fast drying) glue for gluing little flowers on to tissue balls.
I glued inside the pot two pieces of sponge using hot glue. I also crinkled some tissue paper with PVA glue in three different sizes balls. After they dried I glued them in to a pot. I started with the biggest. I used hot glue.
Then I added some leaves using hot glue.
I glued two smaller balls and added some more leaves.
Using some glue I was adding little flowers all around. I used two shades of blue.
Almost ready pot with hydrangea :)
Roses in a pot.
1. I used the pot with sponges glued inside like for hydrangea
2. roses which I hand made (here I posted tutorial for roses :) I just did not cut out the end of the flower so it makes easier to glue it down. I used the second and the third size of roses die from Spellbinders Rose Creation die.
3. hot glue
I glued three bigger roses around the pot.
Then I added some leaves using hot glue.
After adding leaves I added among the bigger roses two small roses.
Then one smaller rose on the top. I added more glue than for other roses so the rose can stick to the other roses and leave with her petals too.
Then I was looking for any spots which need to be glued together.
Added some leaves around.
Ready pot with roses :)
Joanna
Pin It Now!


Simply Gorgeous!
ReplyDelete